
|
|---|
|
|---|
Sunday, June 28, 2009
Defender: Helm with Plate

Friday, June 26, 2009
Defender: How I Make an Eyepiece

As you can see, the outside dimension of each piece stays the same, while the inside hole decreases in size as we move down the page. Some of the outsides are zig-zag while others are smooth. The red lines are the cut lines, while the blue lines are just for planning. The tiny red circles are for alignment pins.

Here are the pieces after being cut out with the laser. The parts on the left were extras I didn't use; the ones on the right were put together with three pins, and sprayed white to seal the cracks.

I then molded the prototype with blue silicone rubber and let it cure overnight. The next day I cast it in a charcoal urethane resin. I drilled holes around the perimeter (that had already been marked with the laser) and inserted twelve rivets to make it a bit steamier. I then remolded it and cast it in black.

Here is the finished part with pewter Rub N Buff™ added to the surface to keep with my black and silver color scheme. I'm not sure yet if I will use this one or recast it in a cold cast aluminum.

The small ½" (12.5 mm) diameter hole at the bottom of the lens sits fairly close to the wearer's eye, allowing him or her to see out, while keeping others from looking in.
Wednesday, June 24, 2009
Defender: The Aether Collector

Luminiferous aether is the substance which fills the upper regions of space beyond the clouds. It is the medium which allows light to travel. The luminiferous aether collection device was designed to gather the energy from the aether and convert it for personal use.
Tuesday, June 23, 2009
Defender: Adding Piping

The pattern for the piping is a rectangle. Here you can see the piping piece at the bottom, and on one of the eye openings the piping has been attached. In addition to looking better, it makes attaching the resin eyepieces easier.
Monday, June 22, 2009
Defender: Starting the Mask

This is a variation of the gas mask, with two respirators on the sides of the snout replacing the single central one, which gives it an eerie alien look.

Each of the two eyepieces will be different. One of them will resemble a camera lens, and the other a porthole.

Here is a photo of the mask after the major leather pieces have all been stitched together.
Thursday, June 18, 2009
Defender: Antiquing the Helm

I've been building the luminiferous aether collection devices that fit into the neckguard trim, and I can't assemble that until they are all cast.

Meanwhile, I have started on the headlamp. Here is a photo of the lamp as I found it at a yard sale. I will break it apart, and then the lamp will attach to the front of the helm.
Monday, June 15, 2009
Defender: The Neckguard Trim
If you take two pieces of paper—one slightly shorter than the other—and fasten the ends together, it will bend into a curve. If you wrap tape around a tube, and keep adding it on over itself, the tape will build up in thickness, with the circumference of each turn being slightly larger than the previous one. Drafting a pattern for the neckguard uses the same principle.

I can make the patterns in paper, and bend and measure them to find the right size differential, but that won't be accurate for cutting it in leather because the leather is thicker than paper, and thus needs a larger differential. Add to that the fact that vegetable tanned leather—which I cut and stitch while damp—will shrink while drying, and I can only guess at how long the trim should be.

Here is the neckguard trim piece after cutting and dying.

And here it is tacked into position. The oblong openings will hold luminiferous aether collection devices.
Friday, May 22, 2009
Underground Explorer: Oxygen Canister
The final piece of the undeground explorer helmet is the oxygen canister which connects to the leather snout. Pictured below is the antiqued canister with rubber tubing and the connection at the other end.

Still to construct is the leather strapping which will allow the canister to be worn on the back or over the shoulder. Brownie points to anyone who can identify the original item from which the canister was made.
I leave for Maker Faire in San Mateo, CA exactly one week from today, and the finished helmet will be the centerpiece of my display.
Monday, May 4, 2009
Underground Explorer: Designing the Goggles
 These giant sized paper glasses are my beginning attempt to work out the pattern for the goggles. This is going to take a lot of trial and error to get it right.
Saturday, May 2, 2009
Underground Explorer: Lamp Comb is Finished

I have decided on all of the design elements of the helmet, and have just two more to complete: The eyecover/goggles, and the oxygen canister which will hook up to the snout. With this equipment our intrepid explorer will be protected from extremes in pressure and temperature, as well as falling rocks. They will also have a bright light to see what lies before them, and have a fresh supply of oxygen to weather the pockets of foul air. Hopefully this will protect them from all unforseen dangers that might lurk ahead.
Friday, April 17, 2009
Underground: First Comb Attempt

Although I will have to remake it this picture gives a pretty good idea of how it will look. Of course once the lamp is mounted onto the front it will change again.
Sunday, April 5, 2009
Space Helmet: The Eyehole Trim

So today—besides antiquing the helmet and snout, and adding the required snaps—I made a trim piece to go around the eye opening. I gussied it up a bit to make it interesting, adding some cut outs, dyed it black and riveted it onto the helm. Sure enough, it reduces the flop factor.
When I add on the collar it should significantly help the helmet hold its shape.
Sunday, March 29, 2009
Designing a Steampunk Spaceman's Helmet
 Here is the plastic helmet as I bought it.
 After thinking about how to break it up into separate leather pieces, I taped it all over with duct tape to make the patterns, and marked the divisions.
 Here I've cut off the duct tape using an Xacto knife, and laid it down on heavy paper.
 Next I've smoothed out the lines, removed the duct tape, and cut out the heavy paper patterns.
 Next using the patterns I cut out the leather pieces, and punched the stitching holes, along with snap and buckle holes. I am leaving the front piece that covers the mouth removable so that the wearer can take it off for eating, etc.
Here I've stitched together the left center piece and the left side piece to see if it will work. I used a seam that exposes the edges, but after seeing it I think I'll remove the thread and do it over with an overlapping seam so that it will lie flat.
Wednesday, March 18, 2009
Designing a New Leather Mask
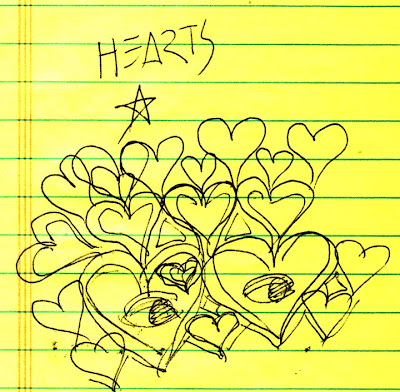 Spring is almost upon us, and leather mask sales should pick up as buyers think about what they're going to wear at music festivals. Above is my first sketch of an idea for a new mask, consisting of a whole bunch of cut out hearts. I drew this right before turning out the lights for bed. The star means I think it's a good design.
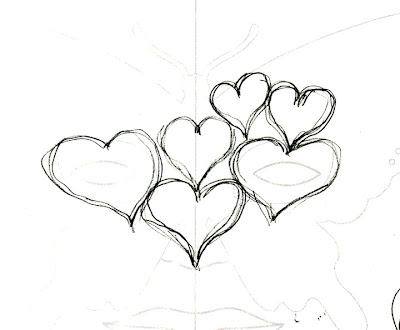
This is the next sketch the following day, seeing how it would work to have the eye openings be larger hearts, with other hearts around it. In designing a mask, the eye openings are critical.
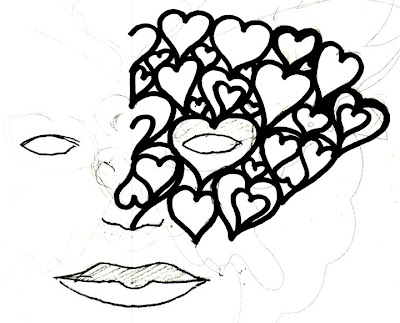 Here I have fleshed out the idea, and after penciling in all the hearts on one half of the face, I have inked them in. Next I scanned this image and brought it into Corel Draw, where I fine-tuned it and mirrored it for the other half of the face.
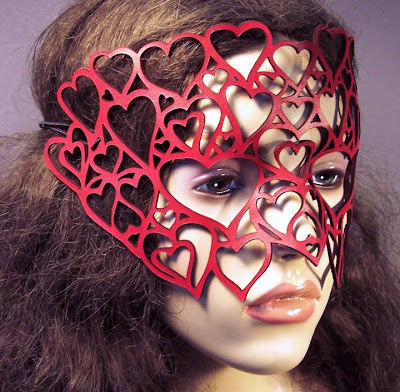
And here is the finished mask, after cutting out the pattern in leather, shaping it to my face form, and painting it red. Lastly, I've listed it the Cut Out Hearts mask on Etsy, where I hope it will quickly sell!
Sunday, March 15, 2009
Leather Wedding Photo Album
 My son and daughter-in-law got married last Spring, and I finally finished a leather photo album for them. There is a baby coming this Summer, and I'm planning on making an album for him too. The floral design on the cover—as well as all the lettering—was laser engraved into vegetable tanned leather that I painted white for contrast.
White Rabbit Mask Makes it in the Pictures

Sunday, February 8, 2009
Raygun Contest!


Every boy dreams of owning a raygun, and as a soon-to-be grandfather, I have tapped back into my boyhood fantasies. I decided I had to build my own rayguns after being inspired by the works of Tinkerbots and Greg Broadmore of WETA Workshop. The Raughnold Model 81 is my first gun.

Following Tinkerbots example, I have created the raygun by assembling found objects, along with some parts I’ve fabricated. It is a marvelously challenging art form: Bringing together disparate objects into something new—a process through which the individual parts disappear into the whole. Part of making it all work together for me is adding bits and pieces to help disguise the original parts so that there is no distraction.

The Contest
I have intentionally not shown the gun in progress as I wanted to hold a contest in which you, the viewers, attempt to guess which found objects I used. In the model 81 there are five objects that I can identify. All were acquired at either a yard sale or a thrift shop. The first person who can correctly identify all five objects will win one of the rayguns, which I am selling on Etsy for $95.

Anyone can participate. Submit the list of your five objects as a comment. If after one week no one has correctly identified all five objects, then I will give out a clue. Each week that passes without a winner will lead to another clue. Please submit only one guess per week. After I have given a clue you are welcome to guess again. The contest will continue until someone correctly guesses the five objects.
Clue #1: None of the objects are gears, nuts, bolts etc.
The Story
We have here an extremely rare raygun manufactured in the late 19th century by the Swedish manufacturer Raughnold. This is their model 81, famous for its sleek lines and fine balance, coupled with its extremely effective vaporizing ray. The functioning of the raygun is not well understood, but we do know that the power generator in the center of the gun sends a ray through the pulse delineator which is amplified by the particle accelerator.
Measuring over 14” long, this beauty is solidly built, yet light enough to be handled even by those of the feminine persuasion. From the particle accelerator nozzle all the way to the rear exhaust port, this raygun exudes quality. The gun is cast in resin, with a hand-stitched leather grip. A custom wet-formed leather holster will be available soon.
Tuesday, January 27, 2009
Life's Latest Lesson
 Today I learned that if you take an elephant and make his ears round and move them to the top of his head he turns into a large rodent. A cartoon mouse even. Who knew! In the illustration the drawing on the left represents the original pachyderm gas mask concept. The drawing on the right is what the mask currently resembles. Clearly I need a model of a full-sized human head on which to make my patterns. Guessing—the technique I have been using up to this point—doesn't always work. OK, there is any easy enough workaround for this, and that is to take the strap that the ears are attached to and lengthen it so that the ears hang a bit lower. Hopefully, the elephant will then return!
Sunday, January 25, 2009
Pachyderm: Making the Eardrums

My first thought was to make a resin piece that would just fit into the opening of the copper ear. My concerns were how to attach the ear and the eardrum to the strap which will fasten to the mask itself with snaps, and how to keep the weight down. A mask of this size can get heavy pretty fast, and be uncomfortable to wear. I was planning on bolting the eardrum through the ear and through the strap, but this presented the problem of hiding the bolt head on the front of the eardrum, and also on the bottom side of the leather strap where it could rub against the wearer’s skin.

After deciding that a resin piece would be too difficult to attach and too heavy, I considered a wire screen or other thin metal dome. Given that I don’t have many metalworking skills, I eventually opted for making the eardrum out of formed leather.

I knew I wanted the eardrum to be domed to give it a little class, so all I needed was a form over which I could shape the vegetable tanned leather. I looked around my shop for a suitable something—I was thinking of a bottle lid—to no avail. I thought perhaps a drawer pull would have the right shape to it if I could find one with the right diameter. Going to my local hardware store I quickly found just the knob I needed. The first picture shows the copper ear, the knob, and a piece of plywood ready for attaching the knob to.

I carefully measured the opening in the copper ear, and cut a hole the same size into a piece of ¼” acrylic plastic. I added a second piece of wood on top of the plywood to reduce the height of the knob, thus completing my forming jig, as shown in the third picture.

I then cut out a circular piece of oversized leather with the ventilation holes already cut, and soaked it in water to make it plastic. I laid the damp leather over the knob, and forced the acrylic piece down over the leather and knob, stretching the leather and conforming it smoothly to the knob. I held the forming jig together with two clamps as shown, and let the leather dry.
Saturday, January 24, 2009
Pachyderm: Covering the Trunk Hose


